
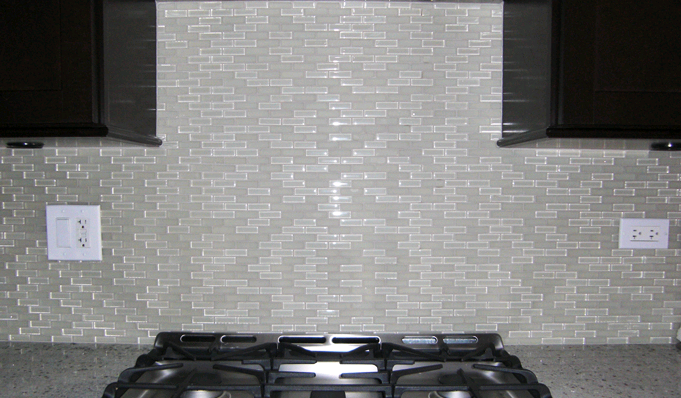
 Creating a beautiful mosaic tile backsplash is one of the quickest ways to give your kitchen an attention-grabbing upgrade.This easy DIY mosaic tile backsplash is gorgeous, easy to maintain, and simple to DIY. Plus, it can be a big help in protecting walls from spills and water damage.
Here’s the step-by-step tutorial to create your own easy DIY mosaic tile backsplash.
Step 1: Measure Your Wall
To determine the amount of tile you’ll need, calculate your wall square footage by measuring the space and multiplying the width by the height.
Next, add an additional 10 percent to the total to cover small gaps and possible mistakes.
Step 2: Clear Your Workspace
Remove all appliances and cookware from your countertop. Depending on your design, you may need to disconnect your stove and move it away from the wall. Follow your manufacturer’s instructions for proper handling. Next, shut off the power to all electrical outlets or light switches in your workspace and remove the faceplates.
Place a layer of cardboard over your countertop to protect it from debris, and use painter’s tape to cover the edges of your countertop, the underside of your cabinet, and any other surfaces you want to keep clean.
Step 3: Prep the Wall
To prevent hidden damage from showing up later, it’s important that you inspect and repair your kitchen walls before installing your backsplash.
To clean your walls, fill a large bucket with mild soap and water for rinsing. Painted walls can be wiped down with trisodium phosphate and sanded gently, while glossy surfaces are typically sanded. Make sure to check the wall behind the stove for any oil or grease stains. These should be cleaned with degreaser or primer for extra tough stains. Allow all surfaces to dry completely before continuing on to the next step.
Step 4:Tile Setting Mat
Tile Setting Mat is a peel-and-stick material that replaces mortar or adhesive when applying tile to a wall. It’s easier to use and much less messy than troweling on mortar.You’ll roll the Mat out on the wall, then trim the material with scissors or a utility knife and then press it on the wall. Make sure to flatten out any air bubbles and creases.
Step 5: Lay the Tile
First, clean the back of the Mosaic Tile with a damp sponge and then let it dry completely before setting. Remove clear plastic from Mat and lightly set tile into place using tile spacers. Adjust tiles as needed to ensure it’s level and press firmly into place.
If the space between the top row of tiles and the cabinetry is greater than an inch, use the tile cutter to cut extra tile pieces to fit the space.
Step 6: Grout the Tile
Make sure to grout within 24 hours of setting the tile over tile setting mat. Put on your gloves and apply grout with float and spread evenly at a 45-degree angle. After 2-4 minutes use a grout sponge to lightly shape and smooth the grout joints.
Step 7: Clean the Backsplash
Wipe residue first with a wet sponge and then with a damp microfiber cloth to remove any excess residue.
Wait 24 hours before using the surface.
Take a weekend to tackle this project and you’ll enjoy the benefits for years to come.Tsianfan industry has a team dedicated to providing you with the most cost effective solutions for design and manufacturing mosaic tile frame.More info ,please click our website:stonepackingcase.com